





Skip to content
Sign in Create account
Features Watch the league

Watching North America and Europe 12 leagues

Back to the squad

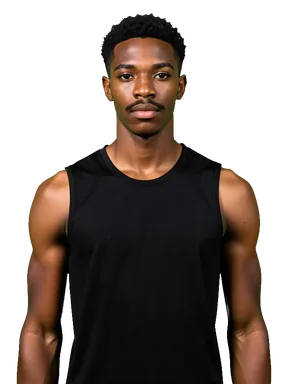
Grady
Dorsey

Point guard
Best Five, round 12

Best Five, round 12

Named in the best five of the round by the league. It stays on his card for a week of game days.

Denver Bighorns

24 years · 187 cm · 85 kg · United States · Squad number 95

At a glance

Overall 81–99
Potential 81–99 At his ceiling.
Ability and potential ⁠
What is Stars?

Stars

The grade your scouts give him out of five, for his ability now and for his potential. Half a star is ten rating points. Solid stars are what your scouts know; light blue stars are how far they might be out.

Nothing on its own. The stars are read from the same number or band printed beside them, so they never say more than it does.

Scout him. A narrower range turns light blue stars solid; your own players read exact.

See all terms

Fans Icon
Merchandise Best seller at the club
Habits None yet

Run a basketball club of your own

You pick the squad, work the market and set up the night's games. It is free to start, and you can be playing in minutes.

Where he is at home

⁠
What is Familiarity?

Familiarity

How at home a player is at a position, from 1 to 99. His own position is always 99. Anywhere else it is what he has earned: it starts where the distance from his own position puts it, rises with the minutes he plays there and with a training focus on it, and slips when he neither plays nor trains it.

The cost of standing there. Every attribute he has is cut by up to 18 percent at the lowest familiarity and by nothing at 99, so a man who is at home at two positions is two players. It also decides who your assistant can use at the spot, who counts as cover for it in the fit report, and which second position he is listed at.

Play him there, or choose the position as his training focus in the second slot of his plan. Both together are fastest. Keep playing him there afterwards: a position left idle fades by about a level a season.

See all terms

Natural PG Point guard Natural
Learning SG Shooting guard Learning
Unfamiliar SF Small forward Unfamiliar
Unfamiliar PF Power forward Unfamiliar
Unfamiliar C Centre Unfamiliar
Natural Accomplished Learning Unfamiliar

Where he stands

Scoring 39.6 a game 1 of 420
Rebounding 6.6 a game 30 of 420
4.8 assists a game 38 of 420
Game score 34.6 a game 2 of 420
What is game score?

One number for how much a player did in a game: scoring, rebounds, assists, steals and blocks counted up, with missed shots, turnovers and fouls taken off. It is a published basketball measure and not one this game invented. It changes nothing on the floor: every figure in it was printed on a match report that everybody could read, which is why it can be shown for any player at any club.

Among the 420 players with at least 5 games this season.

Last five

MIN · PTS · REB · AST
at Portland Ospreys 37.7 44 3 3 +2
vs Los Angeles Catamounts 35.8 43 10 4 0
at Vancouver Steelheads 36.0 45 8 4 +15
vs Seattle Sockeyes 36.5 32 5 4 -21
at Boston Frigates 32.2 34 7 9 +21

⁠
Where he shoots

Where he shoots

The season of one man in the three zones: the share of his shots from each, and how well he scores there against the league.

It is a record of what he has done, counted from his box scores. The sentence names the zone he leans on, when his share there is a quarter above the league average.

Give him the role that suits it: a rim finisher is best with passers, a shooter with space. His shooting attributes are the cause, this is the effect.

See all terms

season 2 · from day 6
35 / 47 75% · rim 17 / 28 61% · mid 19 / 34 56% · three

Takes his shots from everywhere.

  • above the league's zone average
  • below it
RIM 35 / 47 · 75% 43% of his shots · league 67% · league 38% 70pts
MID 17 / 28 · 61% 26% of his shots · league 44% · league 20% 34pts
THREE 19 / 34 · 56% 31% of his shots · league 39% · league 42% 57pts

Attempts 47 + 28 + 34 109

Makes 35 + 17 + 19, 65% from the floor 71

⁠
Every shot this season

Every shot this season

One dot for each field-goal attempt he took in a league game this season, filled when it went in and hollow when it missed. How far from the ring is the match record; the side of the floor it came from is drawn for the picture, the same way the replay stages it, so every reader sees the same dot.

It is a record, not a rule. The zones and their makes are counts of the dots, and the line under them sets those counts beside his box score: they are equal when the dots cover every game.

Read where his makes cluster, then give him the role and the minutes that put his shots there. Filter by quarter to see whether he fades or finishes.

See all terms

season 2 · from day 6

109 of 109 shots shown

10 ft 20 ft Q1 1:07 · Grady Dorsey · a 2-foot finish at the rim, blocked by Colin Graves · missed. Q2 8:45 · Grady Dorsey · a 3-foot finish at the rim · missed. Q2 5:53 · Grady Dorsey · a 3-foot finish at the rim · missed. Q2 4:54 · Grady Dorsey · a 3-foot finish at the rim · missed. Q2 10:19 · Grady Dorsey · a 20-foot jumper · missed. Q2 8:35 · Grady Dorsey · a 10-foot jumper · missed. Q2 8:07 · Grady Dorsey · a 24-foot three · missed. Q2 5:40 · Grady Dorsey · a 29-foot three · missed. Q4 11:15 · Grady Dorsey · a 1-foot finish at the rim · missed. Q4 7:07 · Grady Dorsey · a 1-foot finish at the rim · missed. Q4 1:27 · Grady Dorsey · a 22-foot three · missed. Q1 10:23 · Grady Dorsey · a 18-foot jumper · missed. Q2 5:45 · Grady Dorsey · a 13-foot jumper · missed. Q2 4:03 · Grady Dorsey · a 27-foot three · missed. Q3 0:51 · Grady Dorsey · a 1-foot finish at the rim, blocked by Jack Carter · missed. Q4 7:56 · Grady Dorsey · a 26-foot three · missed. Q4 0:08 · Grady Dorsey · a 26-foot three · missed. Q1 10:39 · Grady Dorsey · a 3-foot finish at the rim, blocked by Salisu Nwankwo · missed. Q1 9:19 · Grady Dorsey · a 19-foot jumper · missed. Q1 4:54 · Grady Dorsey · a 27-foot three · missed. Q1 4:27 · Grady Dorsey · a 21-foot three · missed. Q1 2:54 · Grady Dorsey · a 22-foot three · missed. Q2 9:02 · Grady Dorsey · a 27-foot three · missed. Q2 1:30 · Grady Dorsey · a 2-foot finish at the rim · missed. Q3 5:50 · Grady Dorsey · a 22-foot three · missed. Q3 3:27 · Grady Dorsey · a 2-foot finish at the rim, blocked by Chad Farrell · missed. Q3 3:27 · Grady Dorsey · a 25-foot three · missed. Q3 2:21 · Grady Dorsey · a 28-foot three · missed. Q4 4:29 · Grady Dorsey · a 1-foot finish at the rim · missed. Q4 3:22 · Grady Dorsey · a 3-foot finish at the rim · missed. Q1 11:32 · Grady Dorsey · a 22-foot three · missed. Q1 4:11 · Grady Dorsey · a 13-foot jumper · missed. Q3 7:29 · Grady Dorsey · a 16-foot jumper · missed. Q3 7:29 · Grady Dorsey · a 26-foot three · missed. Q4 8:01 · Grady Dorsey · a 15-foot jumper · missed. Q4 5:29 · Grady Dorsey · a 10-foot jumper · missed. Q4 4:54 · Grady Dorsey · a 10-foot jumper · missed. Q4 2:09 · Grady Dorsey · a 20-foot jumper · missed. Q1 11:03 · Grady Dorsey · a 24-foot three, assisted by Brody Garrett · made. Q1 10:34 · Grady Dorsey · a 3-foot finish at the rim, unassisted · made. Q1 10:05 · Grady Dorsey · a 25-foot three, assisted by Brody Garrett · made. Q1 2:46 · Grady Dorsey · a 1-foot finish at the rim, unassisted · made. Q2 10:39 · Grady Dorsey · a 2-foot finish at the rim, unassisted · made. Q2 9:54 · Grady Dorsey · a 23-foot three, assisted by Ashton Faulkner · made. Q2 4:54 · Grady Dorsey · a 24-foot three, assisted by Alejandro Greer · made. Q3 9:10 · Grady Dorsey · a 1-foot finish at the rim, unassisted · made. Q3 3:57 · Grady Dorsey · a 3-foot finish at the rim, assisted by Brody Garrett · made. Q4 7:31 · Grady Dorsey · a 1-foot finish at the rim, unassisted · made. Q1 11:14 · Grady Dorsey · a 25-foot three, assisted by Draško Perić · made. Q1 8:52 · Grady Dorsey · a 18-foot jumper, assisted by Eugene Bowers · made. Q2 6:12 · Grady Dorsey · a 3-foot finish at the rim, assisted by Draško Perić · made. Q2 5:09 · Grady Dorsey · a 27-foot three, unassisted · made. Q3 6:28 · Grady Dorsey · a 17-foot jumper, assisted by Eugene Bowers · made. Q3 5:16 · Grady Dorsey · a 28-foot three, assisted by Eugene Bowers · made. Q3 3:42 · Grady Dorsey · a 24-foot three, assisted by Alejandro Greer · made. Q4 8:05 · Grady Dorsey · a 3-foot finish at the rim, unassisted · made. Q4 6:42 · Grady Dorsey · a 11-foot jumper, assisted by Draško Perić · made. Q4 6:04 · Grady Dorsey · a 1-foot finish at the rim, assisted by Miljan Savković · made. Q4 4:03 · Grady Dorsey · a 12-foot jumper, unassisted · made. Q1 10:54 · Grady Dorsey · a 29-foot three, assisted by Draško Perić · made. Q1 9:58 · Grady Dorsey · a 1-foot finish at the rim, unassisted · made. Q1 4:46 · Grady Dorsey · a 2-foot finish at the rim, unassisted · made. Q1 4:14 · Grady Dorsey · a 26-foot three, assisted by Brody Garrett · made. Q1 3:11 · Grady Dorsey · a 1-foot finish at the rim, unassisted · made. Q1 2:32 · Grady Dorsey · a 2-foot finish at the rim, unassisted · made. Q1 1:41 · Grady Dorsey · a 1-foot finish at the rim, unassisted · made. Q1 1:12 · Grady Dorsey · a 2-foot finish at the rim, assisted by Miljan Savković · made. Q2 5:59 · Grady Dorsey · a 13-foot jumper, assisted by Héctor Esan · made. Q2 2:42 · Grady Dorsey · a 3-foot finish at the rim, assisted by Ashton Faulkner · made. Q2 2:10 · Grady Dorsey · a 25-foot three, assisted by Alejandro Greer · made. Q2 0:07 · Grady Dorsey · a 20-foot jumper, assisted by Corey Diaz · made. Q3 11:20 · Grady Dorsey · a 12-foot jumper, unassisted · made. Q3 9:46 · Grady Dorsey · a 16-foot jumper, unassisted · made. Q4 10:27 · Grady Dorsey · a 1-foot finish at the rim, assisted by Eugene Bowers · made. Q4 7:20 · Grady Dorsey · a 2-foot finish at the rim, assisted by Héctor Esan · made. Q4 4:16 · Grady Dorsey · a 3-foot finish at the rim, unassisted · made. Q1 12:00 · Grady Dorsey · a 1-foot finish at the rim, unassisted · made. Q1 4:27 · Grady Dorsey · a 25-foot three, assisted by Draško Perić · made. Q2 10:08 · Grady Dorsey · a 26-foot three, assisted by Eugene Bowers · made. Q2 9:33 · Grady Dorsey · a 1-foot finish at the rim, assisted by Miljan Savković · made. Q2 8:38 · Grady Dorsey · a 27-foot three, assisted by Miljan Savković · made. Q2 0:42 · Grady Dorsey · a 3-foot finish at the rim, assisted by Alejandro Greer · made. Q3 11:33 · Grady Dorsey · a 17-foot jumper, unassisted · made. Q3 10:26 · Grady Dorsey · a 1-foot finish at the rim, assisted by Ashton Faulkner · made. Q3 10:08 · Grady Dorsey · a 19-foot jumper, assisted by Alejandro Greer · made. Q3 4:32 · Grady Dorsey · a 3-foot finish at the rim, unassisted · made. Q3 3:55 · Grady Dorsey · a 25-foot three, assisted by Miljan Savković · made. Q4 6:39 · Grady Dorsey · a 2-foot finish at the rim, assisted by Alejandro Greer · made. Q4 5:22 · Grady Dorsey · a 17-foot jumper, unassisted · made. Q4 3:42 · Grady Dorsey · a 12-foot jumper, unassisted · made. Q4 2:10 · Grady Dorsey · a 2-foot finish at the rim, unassisted · made. Q4 1:38 · Grady Dorsey · a 1-foot finish at the rim, unassisted · made. Q1 1:01 · Grady Dorsey · a 2-foot finish at the rim, assisted by Miljan Savković · made. Q2 10:29 · Grady Dorsey · a 12-foot jumper, assisted by Darius Branch · made. Q2 9:01 · Grady Dorsey · a 2-foot finish at the rim, assisted by Eric Ferguson · made. Q2 8:41 · Grady Dorsey · a 15-foot jumper, unassisted · made. Q2 7:45 · Grady Dorsey · a 1-foot finish at the rim, unassisted · made. Q2 7:07 · Grady Dorsey · a 16-foot jumper, assisted by Colby Gibson · made. Q2 6:36 · Grady Dorsey · a 4-foot finish at the rim, unassisted · made. Q3 6:26 · Grady Dorsey · a 14-foot jumper, unassisted · made. Q3 4:58 · Grady Dorsey · a 21-foot jumper, unassisted · made. Q3 3:50 · Grady Dorsey · a 1-foot finish at the rim, unassisted · made. Q3 2:28 · Grady Dorsey · a 26-foot three, assisted by Héctor Esan · made. Q3 0:01 · Grady Dorsey · a 3-foot finish at the rim, assisted by Héctor Esan · made. Q4 11:14 · Grady Dorsey · a 26-foot three, assisted by Alejandro Greer · made. Q4 4:54 · Grady Dorsey · a 26-foot three, assisted by Brody Garrett · made. Q4 4:17 · Grady Dorsey · a 28-foot three, assisted by Alejandro Greer · made. Q4 3:49 · Grady Dorsey · a 3-foot finish at the rim, unassisted · made. Q4 1:45 · Grady Dorsey · a 2-foot finish at the rim, assisted by Miljan Savković · made.
  • Made
  • Missed
  • bar = blocked
  • Distance is the match record. The side of the floor is drawn for the picture.

Shots by zone

Counts of the dots
RIM 35 / 47 74% · avg 2.0 ft 70pts
MID 17 / 28 61% · avg 15.2 ft 34pts
THREE 19 / 34 56% · avg 25.4 ft 57pts

The dots are his box score: 71 of 109 from the floor in 5 games.

⁠
How good his shots are

Expected points

The points the league gets from shots like this one this season: the zone, the play, whether it came on the break and whether it came on a second chance. It does not know who was guarding or how far out he stood, because the game records neither. A club's expected points are the sum over its shots, and every figure opens to the kinds of shot it is made of.

It is a measure, not a rule: nothing in a match depends on it. It tells shot selection (how good the shots were) apart from shot-making (what the men did with them), so a bad night reads as bad luck or bad shots rather than just a bad night.

Take more of the shots the league scores most from, the rim and the open three, and fewer long pull-ups; the tactics page moves shots between them.

See all terms

Hot hand

His shots are worth a little less than the league's, and he makes them for more.

Shots are worth 1.16
League 1.16
Made for 1.48
How we counted it
Expected points: his 109 shots, kind by kind126.4
÷ 109 shots1.16
Points from the floor: 2 × 71 + 19161
÷ 109 shots1.48

Expected points are measured against league rates through round 13.

His shots, kind by kind
Kind of shotShotsWorthPoints
Mid-range · Drive44 % of 383 league shots30.892.7
Mid-range · Post-up41 % of 343 league shots40.823.3
Mid-range · Post-up · second chanceonly a few league shots like it, so the same play from the same zone: 41 % of 43810.810.8
Mid-range · Post-up · fast breakonly a few league shots like it, so the same play from the same zone: 41 % of 43810.810.8
Mid-range · Catch and shoot47 % of 426 league shots30.932.8
Mid-range · Pull-up46 % of 968 league shots110.9110.0
Mid-range · Pull-up · fast breakonly a few league shots like it, so the same play from the same zone: 44 % of 1 31650.894.4
Rim · Drive65 % of 2 289 league shots211.3127.5
Rim · Drive · fast break68 % of 732 league shots71.369.5
Rim · Post-up65 % of 656 league shots41.315.2
Rim · Catch and shoot67 % of 622 league shots41.335.3
Rim · Catch and shoot · second chanceonly a few league shots like it, so the same play from the same zone: 68 % of 92911.361.4
Rim · Catch and shoot · fast breakonly a few league shots like it, so the same play from the same zone: 68 % of 92951.366.8
Rim · Pull-up66 % of 322 league shots41.325.3
Rim · Pull-up · fast breakonly a few league shots like it, so the same play from the same zone: 65 % of 48411.301.3
Three · Drive40 % of 351 league shots41.214.9
Three · Drive · second chanceonly a few league shots like it, so the same play from the same zone: 39 % of 52111.161.2
Three · Drive · fast breakonly a few league shots like it, so the same play from the same zone: 39 % of 52121.162.3
Three · Post-uponly a few league shots like it, so the zone's rate: 38 % of 6 24111.151.2
Three · Catch and shoot39 % of 3 419 league shots161.1718.8
Three · Catch and shoot · second chance37 % of 449 league shots31.113.3
Three · Catch and shoot · fast break36 % of 574 league shots31.083.2
Three · Pull-up37 % of 854 league shots31.113.3
Three · Pull-up · second chanceonly a few league shots like it, so the same play from the same zone: 38 % of 1 14211.131.1
Total adds up1091.16126.4
Hot hand

Well above what his shots are worth

+34.6

His shots are the kind that score 126.4 points. He has scored 161.

How we counted it
161 points from the floor − 126.4 expected+34.6
More statsThe kinds of shot he takes
DrivePost-upCatch and shootPull-up
He
35% 10% 32% 23%
League
31% 9% 41% 20%

Honours

Nothing yet. A title counts for him when he played at least half of his club's games that season; an award is given on the season's last days.

Round honours

Player of the Round 0× · Best Five 3×

Best Five, round 12: 44 points, 3 rebounds, 3 assists
  • 44 points +44.0
  • 17 field goals made +6.8
  • 25 field goals attempted -17.5
  • 1 offensive rebound +0.7
  • 2 defensive rebounds +0.6
  • 3 steals +3.0
  • 3 assists +2.1
  • 1 block +0.7
  • 1 foul -0.4
  • 2 turnovers -2.0
  • Game Score 38.0

Each round names its best player and its best five by Game Score, one line, whatever they play. It is a record on his page and does not change his reputation.

At a glance

Today

Form ⁠
What is Form?

Form

Whether he has been playing well lately, measured against what a player of his rating should be producing. Runs from −1 to +1, and starts at 0.

How he shoots and performs in the next match, alongside the team's form as a whole.

Nothing but playing well clears it. It answers a question nothing else in the model does: rating is what he can do, morale is how he feels, consistency is how widely he swings, and none of them remembers last week.

See all terms

0.7

What he can do

a range: what the game shows

Playmaking 77–95

Passing 81–99

Passing

Delivery, accuracy and timing.

How many assists he creates, and how often a pass of his is turned over.

Ball handling 81–99

Ball handling

Dribbling under pressure.

How often he loses the ball, and whether he can start a drive at all.

Basketball IQ 81–99

Basketball IQ

Reading the game: positioning, rotations, knowing what is about to happen.

Where he is standing on defence, whether the help arrives, and whether he sees the pass that is there.

Decision making 81–99

Decision making

Shot selection, and knowing when to pass.

The quality of the shots he chooses, and how often he turns the ball over.

Screening 61–80

Screening

Setting screens, and using them.

His teammates' shot quality and the screen assists he generates: not his own scoring. A great screener raises the whole lineup and appears in nobody's box score.

Scoring 81–99

Three-point 81–99

Three-point shooting

How well he shoots from beyond the arc.

How often his three-point attempts go in, and, through the lineup around him, how much room everyone else has to work in.

Mid-range 81–99

Mid-range shooting

Pull-ups and jumpers inside the arc.

How often his mid-range attempts go in.

Finishing 81–99

Finishing

Scoring at the rim, through contact.

How often he scores at the rim, how often he draws the foul with the basket, and how well he converts in transition.

Free throws 81–99

Free-throw shooting

How reliably he makes free throws.

How often his free throws go in, and nothing else, deliberately, so that a poor free-throw shooter can be punished by fouling him.

Off the ball 81–99

Movement off the ball

Cutting, relocating and getting open when he does not have the ball.

The quality of the shots he receives, and the chances he creates for himself without the ball in his hands.

Inside 61–80

Post play 61–80

Post play

Back-to-basket scoring, and passing out of the post.

How often the offence goes through him with his back to the basket, and how well it works when it does.

Offensive boards 61–80

Offensive rebounding

How hard and how well he goes after a shot his own team has missed, instead of retreating.

The share of your own missed shots he wins back.

Defensive boards 61–80

Defensive rebounding

How reliably he ends a possession by claiming the ball after a miss at his own basket.

The share of the opponent's missed shots he ends the possession on.

Shot blocking 61–80

Shot blocking

How often he gets a hand to what is put up near the rim, and how hard he makes it to shoot over him.

How many shots he blocks, and how many the opponent declines to take at the rim because he is standing there.

Defence 71–90

Perimeter 81–99

Perimeter defence

How well he stays in front of the man he is marking out on the wing and at the arc.

How good a look the man he is guarding gets from outside.

Interior 61–80

Interior defence

Guarding the paint and defending the post.

How good a look the opponent gets at the rim.

Steals 81–99

Stealing

Forcing live-ball turnovers.

How often he takes the ball off the opponent.

Aggression 61–80

Aggression

Defensive intensity and physicality.

How many fouls he commits, how often he goes for the steal, and how much pressure the opponent feels.

Athletic 72–91

Speed 81–99

Speed

Top-end speed in the open court.

How often your team gets out in transition, and how often it scores when it does.

Acceleration 81–99

Acceleration

First step and change of pace.

Whether his drives get past the man, and whether he recovers to close out.

Agility 81–99

Agility

Lateral quickness and change of direction.

Perimeter defence above all, and keeping a driver in front of him.

Leaping 61–80

Leaping

How high he gets off the floor.

Rebounding at both ends, blocked shots, and finishing at the rim.

Strength 81–99

Strength

Physical power and holding position.

Post play, finishing through contact, and rebounding.

Stamina 81–99

Stamina

How well he resists tiring during a game.

How many minutes he can play before his performance starts to drop, and how far it drops late in games.

Durability 41–60

Durability

How well he stands up to the wear of a season.

How quickly he recovers between matches, and how often he picks up a minor knock.

Mental 61–80

Composure 81–99

Composure

How he performs under pressure.

Shooting and free throws in the last three minutes of a close game, and turnovers late.

Consistency 61–80

Consistency

How reliable he is from one night to the next.

How widely his performance swings around his own average. It changes the spread rather than the level, so two players with the same season figures can be completely different to manage.

Work ethic 41–60

Work ethic

How hard he applies himself in training.

How much he gains from training, and whether he can push a little past his potential. Nothing in a match reads it at all.

Leadership 81–99

Leadership

How much he lifts the players around him.

Your squad's morale, and how steady the team is late in games. It works on his teammates and never on himself.

Determination 41–60

Determination

How hard he keeps working when things are going badly.

How the team behaves when it is trailing, and how much of a comeback it is capable of.

His deal

Contract ends End of season 4

What he is paid is between him and his club. To sign him, make his club an offer, or put a trade together.

Contract

Wage ⁠
What is Wage?

Wage

What the club pays him, as the deal stands today, quoted by the season where the world quotes so and by the week where it does not; it is paid in equal daily shares across every day of the season, offseason included. A contract with an annual rise moves this figure once a season, at rollover, so the number shown is always what is actually being paid rather than what was signed.

The club's wage bill every week, and through the salary rules how much room is left to sign anybody else.

It is fixed until the deal changes. A rise written into the contract, or a new contract altogether.

See all terms

1 948 428 dollars a week
Contract ends ⁠
What is Contract ends?

Contract ends

The season after which his deal runs out. Contracts end at the season's close: when that rollover comes he leaves the squad and enters the free-agent pool, owing the club nothing.

When he can walk away for free, and how urgent the question of his future is. A short deal is a cheap player about to become an expensive decision.

Once a deal is near its end you can offer him new terms, and an agreement takes effect the season after the current one runs out. Leave it and he reaches the free-agent pool, where anybody may sign him.

See all terms

End of season 4

Development

Nothing has moved yet.

Training changes attributes a little at a time, and every change is listed here when it happens.

Back to the squad